Access Point Augmentation
This position augmentation demonstration is for the Billion BiPAC 7800VDPX. If you have another router that is known to work with a similar method, please help the site by documenting the process here.
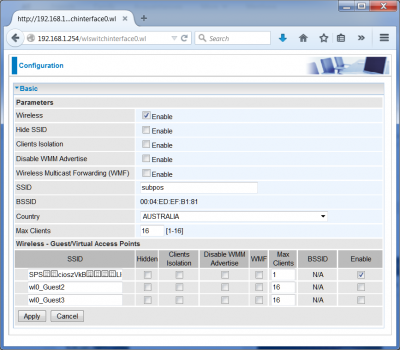
This router allows you to set additional SSIDs for a particular Wi-Fi adapter (2.4G) via this page http://192.168.1.254/wlswitchinterface0.wl
You should be able to convert the position coder's hex character output to ASCII characters and copy and paste this into the SSID text field. If you have problems with this, then lets look at the post command for the form:
http://192.168.1.254/wlcfg.wl?
wlSsidIdx=0&wlEnableHspot=0&wlEnbl=1&wlHide=0&wlAPIsolation=0&wlSsid=subpos
&wlCountry=AU&wlMaxAssoc=16&wlDisableWme=0&wlEnableWmf=0&wlSsid_wl0v1=wl0_Guest1&wlHide_wl0v1=0
&wlAPIsolation_wl0v1=0&wlDisableWme_wl0v1=0&wlEnableWmf_wl0v1=0&wlMaxAssoc_wl0v1=16&wlEnbl_wl0v1=1
&wlSsid_wl0v2=wl0_Guest2&wlHide_wl0v2=0&wlAPIsolation_wl0v2=0&wlDisableWme_wl0v2=0&wlEnableWmf_wl0v2=0
&wlMaxAssoc_wl0v2=16&wlEnbl_wl0v2=0&wlSsid_wl0v3=wl0_Guest3&wlHide_wl0v3=0&wlAPIsolation_wl0v3=0
&wlDisableWme_wl0v3=0&wlEnableWmf_wl0v3=0&wlMaxAssoc_wl0v3=16&wlEnbl_wl0v3=0&wlSyncNvram=1
&sessionKey=44797442
If we modify the form data object "wlSsid_wl0v1" (this label corresponds with the "name" value of the textbox in the html code) with the following URL coded hex data (note that the Billion terminates its SSID string with the 0x00 null character and also doesn't like the space character, so the coder needs to be adjusted to mask these characters for this router), we get the following post command:
http://192.168.1.254/wlcfg.wl?
wlSsidIdx=0&wlEnableHspot=0&wlEnbl=1&wlHide=0&wlAPIsolation=0&wlSsid=subpos
&wlCountry=AU&wlMaxAssoc=16&wlDisableWme=0&wlEnableWmf=0&wlSsid_wl0v1=
%53%50%53%01%01%63%3b%15%0b%07%3b%76%7f%31%07%5b%4d%15%1c%30%07%01%01%21%01%11%30%62%01%07%44
&wlHide_wl0v1=0&wlAPIsolation_wl0v1=0&wlDisableWme_wl0v1=0&wlEnableWmf_wl0v1=0
&wlMaxAssoc_wl0v1=0&wlEnbl_wl0v1=1&wlSsid_wl0v2=wl0_Guest2&wlHide_wl0v2=0
&wlAPIsolation_wl0v2=0&wlDisableWme_wl0v2=0&wlEnableWmf_wl0v2=0&wlMaxAssoc_wl0v2=16
&wlEnbl_wl0v2=0&wlSsid_wl0v3=wl0_Guest3&wlHide_wl0v3=0&wlAPIsolation_wl0v3=0
&wlDisableWme_wl0v3=0&wlEnableWmf_wl0v3=0&wlMaxAssoc_wl0v3=16&wlEnbl_wl0v3=0
&wlSyncNvram=1&sessionKey=44797442
Pop that into your web browser address bar and submit it. If it says invalid session key, just ignore it. Now go back to the original wifi configuration page http://192.168.1.254/wlswitchinterface0.wl:
You will see the new SSID. Make sure Enable is ticked and click Apply. Your new SubPos SSID will be available for positioning.
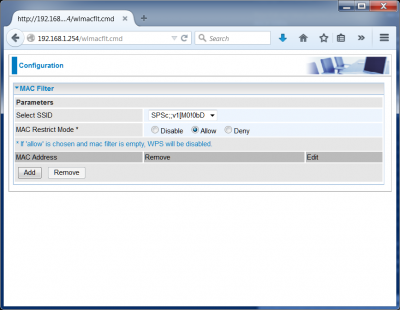
Now you might want to restrict connections to that particular SSID, since enabling extra SSIDs on this router also creates an open network. To restrict all devices from connecting, go to the MAC Filter page for that interface:
Once at that page, select "Allow" for "MAC Restrict Mode". This will deny all unless you specify an allowed device in the list.
SubPos is now enabled on your router!

